Stephanne here, and I am going to show you something furry and fun today!!
I've gotten quite a few inquiries about the colours I use to colour our latest and greatest additions to the Tickled Pink family,
Sir Rupert and Emilio, so me and my best cousin for life Kristen have prepared a small photo tutorial
so you can see how I am layering the colours onto my image!! And hopefully, what I show you will help you feel confident that you too, can get a little foxy, hehehe!!

I have gathered my supplies: Lil Allsorts Emilio, stamped with Black Archival Ink, onto Gina K heavyweight paper, I have my Tea Dye Reinker and distressing pads, a fine and broad paintbrush, and a few Prismacolour pencils that I've found blend quite well with my red fox fuzziness, Dark Brown, Sienna Brown and Burnt Ochre.

To start, I add a couple of drops of reinker into the lid of my tea dye pad

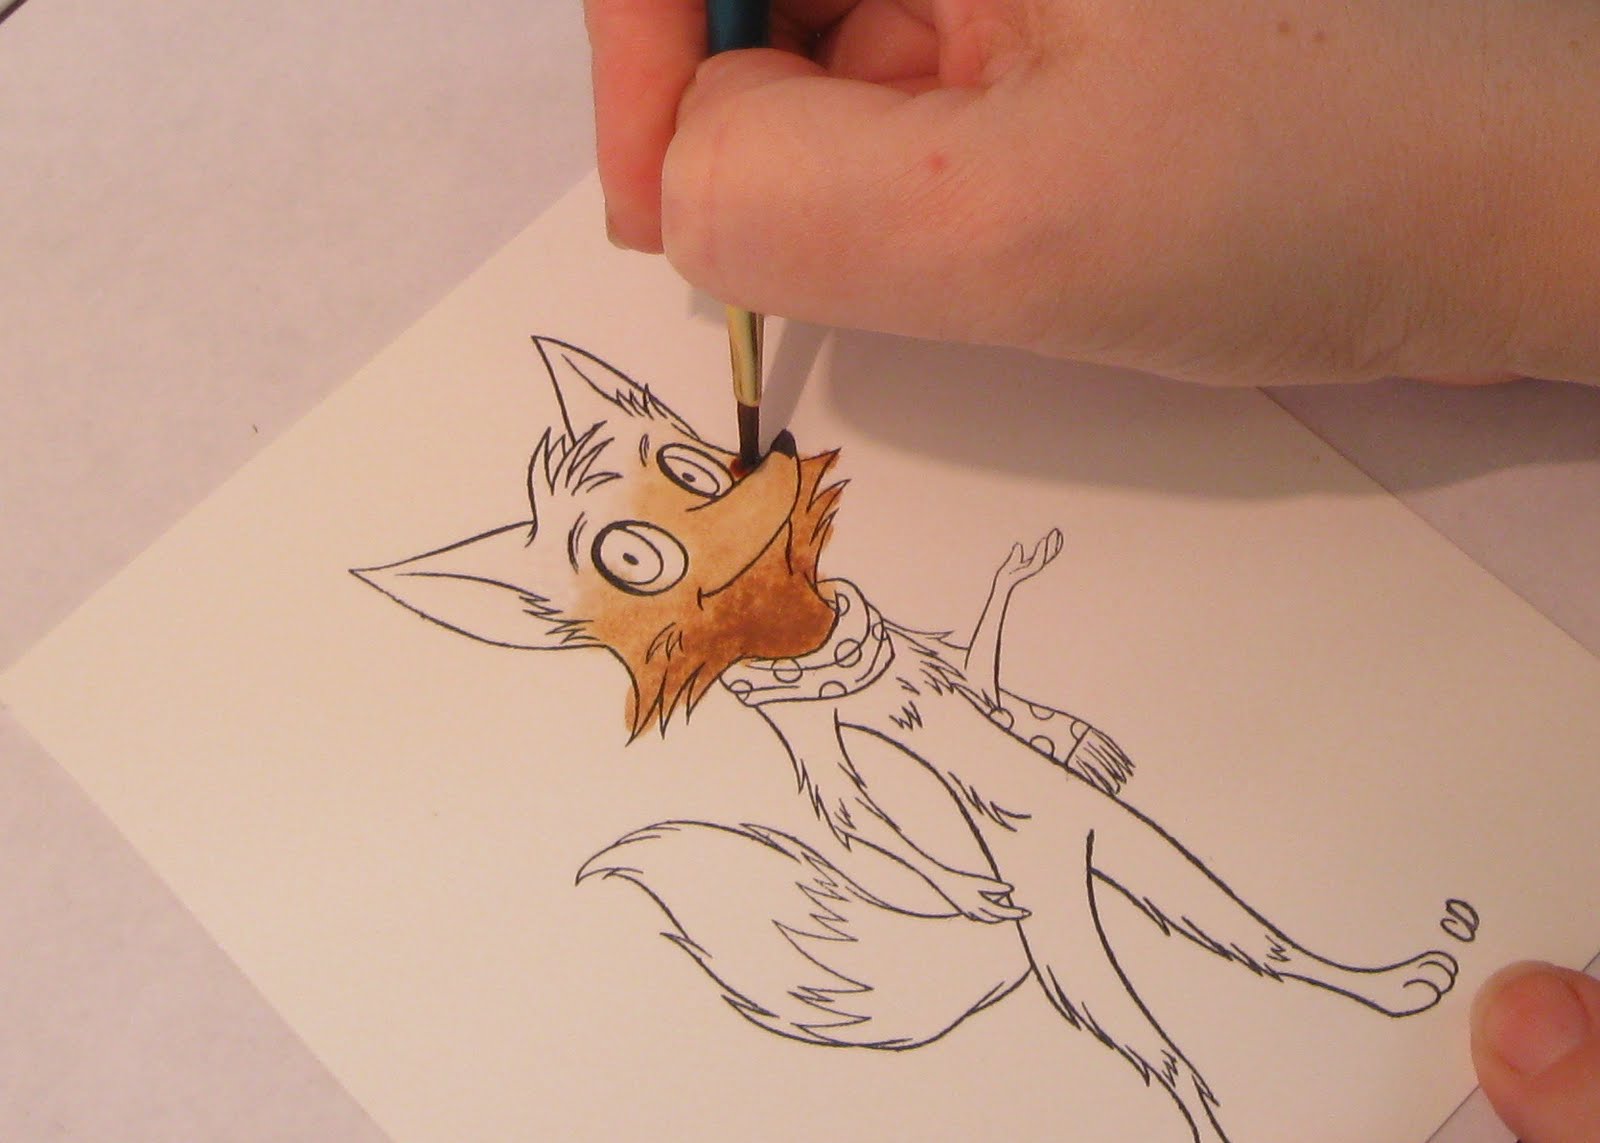
Next, I pick up a small amount of water into my broad brush, enough to moisten the bristles but not sopping wet amounts, and apply it to the area in which I will paint. I am using a E67 Filbert brush for this.

Next, with my moistened (but not wet) brush, I pick up ink from my reinker puddle and apply it to a crease in the image. You'll want to begin application in the areas that you want to emphasize shadowing, and brush the colour outward.

I slowly brush the colour outward in small circular motions

As you move the ink throughout the image, the colour will slowly fade out. This is, indeed, the goal.
At this point, I have added more ink to my brush and am applying it, again, to an area that I want to emphasize with shadowing, and will brush the colour outward in small circular strokes (like writing in cursive) until I complete the shading process.

More spreading and blending....

At this point, I have added just a teeny bit of water to my brush to encourage blending as I daub and brush the colour around the image.

Here is my first layering of colour, which is still wet in some areas, so I allow several minutes to pass before I move onto additional shading.

Now, I will start some additional shading, so I have switched over to my E85 round brush and wet it, pick up reinker and lots of it, and apply, once again, to the areas you wish to draw emphasis to with shadowing.

After applying the ink to my image, I daub it outward, and sort of glide it around until the lines of demarcation appear to be blended.

I allow my image to dry at this point. A few minutes will suffice.
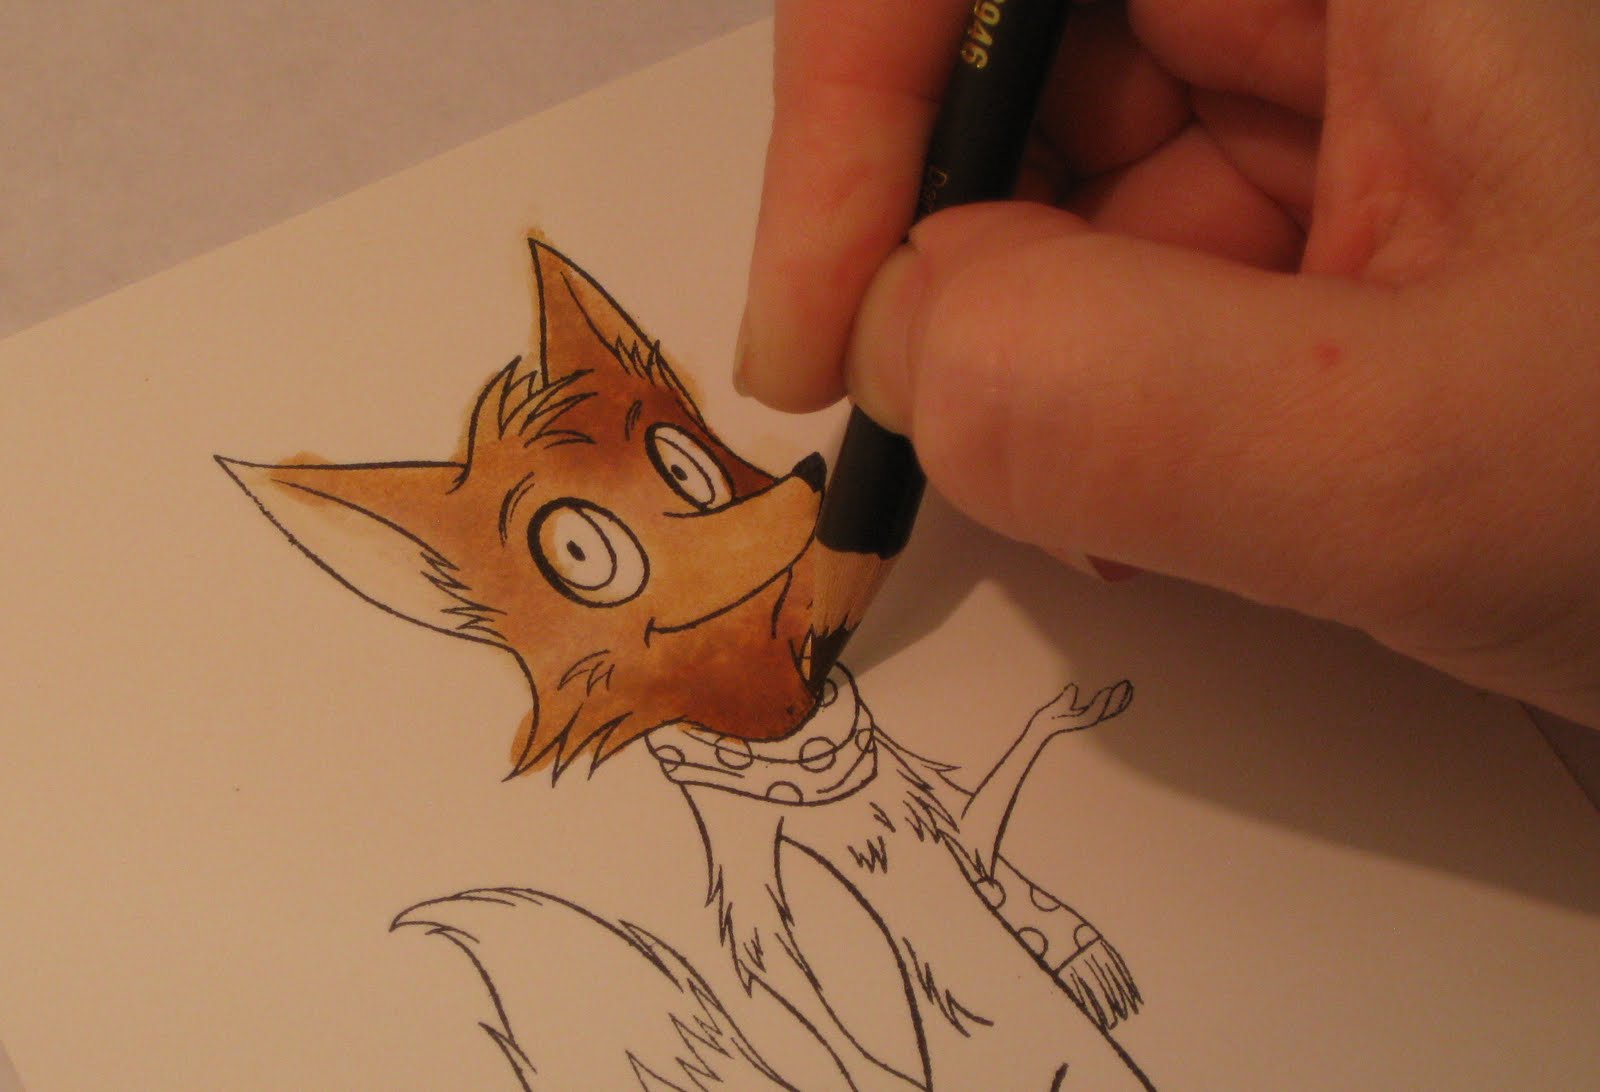
I pick up my dark brown pencil and apply it to the corners of my image, again, where the shadow is to be concentrated.

After I add a bit of Dark Brown, I add Sienna Brown and blend the darker colour into the lighter.

I also use my Sienna Brown to add a little bit of additional shadowing here and there, like behind the ears and in the side bushy cheekness.

Like so......

Now, I know it's sloppy, and I haven't finished colouring his ears and eyes, but I hope that this will give you a general idea of techniques and products I use when colouring with distress inks!!!
Thanks so much for stopping by today,
happy stamping and thInk pInk!!!
stephanne
5 comments:
Brilliant tutorial Stephanne, thanks so much for sharing, gives a little hope to people like me that only stamp rarely
Love Jenni xx
Ooooh! I HAD to pop over and see how you do your FABULOUS colouring! Such an AWESOME tutorial .. thank you!!! :) You so ROCK!!
Love,
Elise
Great tutorial - fabulous colouring - you always put so much time and effort into your coloured images - gorgeous! Cheers Claire x
Great tutorial Stephanne, I always wonder how you color your images...it's just gorgeous!
Love,
Chelsea
Thanks for the tutorial Stephanne! I am going to print this out. If only I could be half as good as you are at using distress inks, would be great!
Post a Comment